Blog
How to mix vocals: The best vocal chain
You need an effective vocal chain to get that clean and polished sound when you mix vocals. Here are the 7 plugins in our vocal chain.
Whether you’re a singer or producer, you know that getting vocals to sit perfectly in the mix can be a challenge. But with the right plugins and careful processing, it’s possible to get a clean, crisp, and clear-sounding vocal. This article will show you how to mix vocals using a basic vocal chain.
We also recommend various stock, premium, and free plugins that work with this vocal chain. So whether your work in FL Studio, Ableton Live, Logic Pro X, Pro Tools, or any other DAW, you should have a stock plugin or a premium and free alternative to get a similar chain set up.
1. Tuning
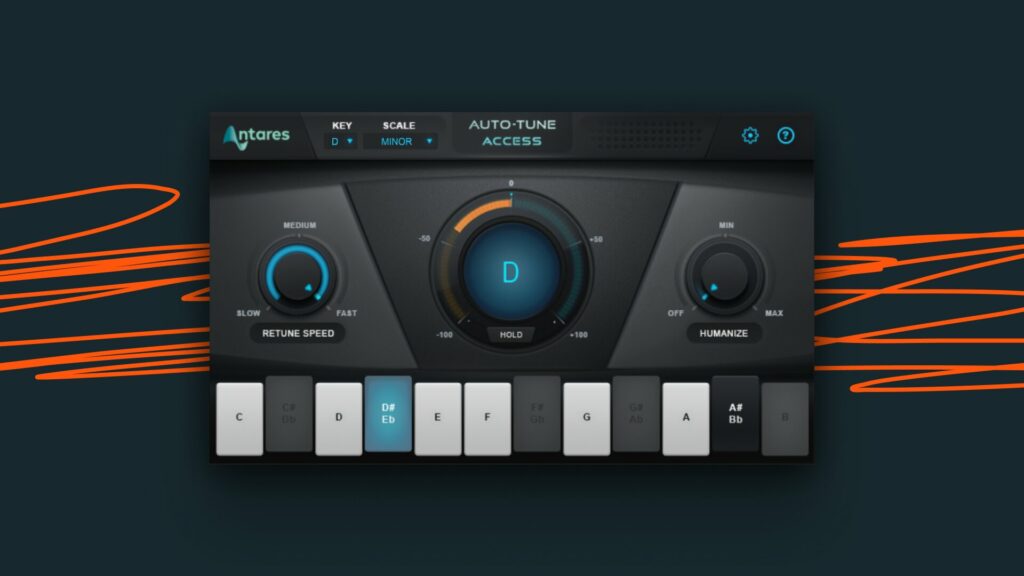
Before polishing your vocals, you should generally take care of tuning them. Whether you do this with a simple auto-tune type plugin or manually with something like Melodyne is up to you.
A tool like Melodyne will give you much finer control over every word in your vocal, letting you tune everything individually, mess with transition speeds, formant shifts, and so much more on a per word/note basis. It’s incredibly powerful but also extremely time-consuming. Unless you’ve been doing this for quite some time, a basic tuner plugin might be the better option. In most cases, selecting the right key and dialing the retune speed knob to taste is just much easier, quicker, and perfectly sufficient.
Plugin recommendation:
FL Studio Stock Pitcher
Logic Pro Stock Pitch Correction or Flex Pitch
Premium Antares Auto-Tune
Premium Melodyne 5
Free MAutoPitch
2. Gate
A gate plugin is an excellent tool for reducing the amount of background noise in your vocal track. Some like to do this manually for maximum control by cutting out all the parts in the audio track where the vocal is not present. However, using a gate is often easier and will save you time when you mix vocals.
In our guide, the gate is the first processing plugin in our chain since you want to remove unwanted background noise immediately. Otherwise, effects like saturation and compression can intensify background noise and make it harder to remove down the line.
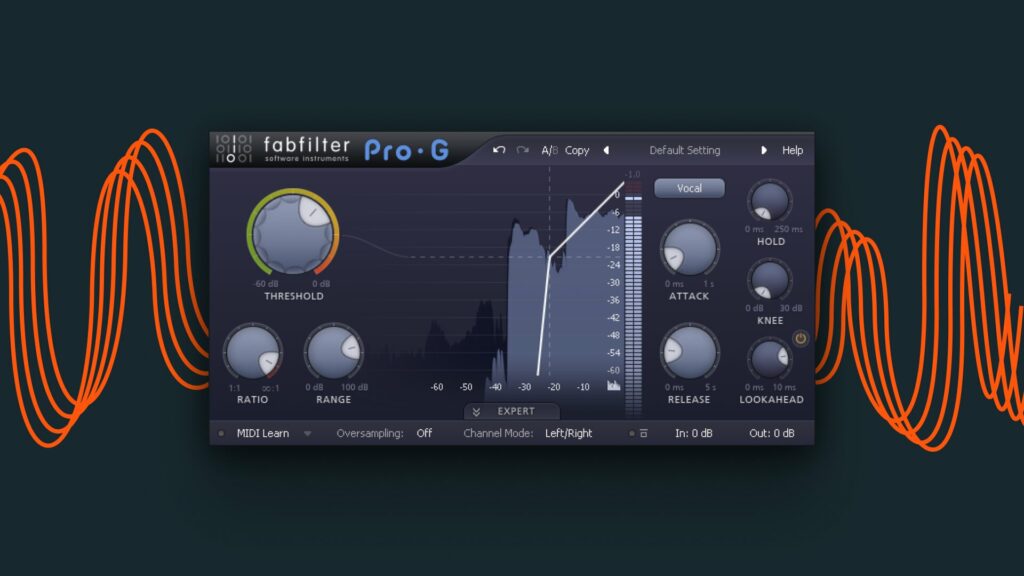
A gate can look intimidating but is actually very easy to use. With most gate plugins, all you need to do is adjust the threshold. Whatever dB level you set the threshold to, the gate will let everything above it play and cut out everything below it. So if your vocal sits nicely at -12dB and some low background noise at -48dB, then you can probably set the gate to anywhere between -20 to -30dB.
Most gate plugins visualize this process nicely, making it even easier to dial in the correct values.
Plugin recommendation:
FL Studio Stock Fruity Limiter
Ableton Live Stock Gate
Logic Pro Stock Noise Gate
Premium FabFilter Pro-G
3. De-esser
A de-esser is a type of compressor specifically designed to reduce sibilance, which are the harsh “S” and “T” sounds that can often be overbearing in a vocal track. Again, just like the gate, you want to do this early on in the processing chain to avoid amplifying these harsh frequencies even further.
De-essing can be done with a standard compressor, but to mix vocals it’s usually not as effective. So in most cases, you’ll want to use a plugin designed explicitly to de-ess.
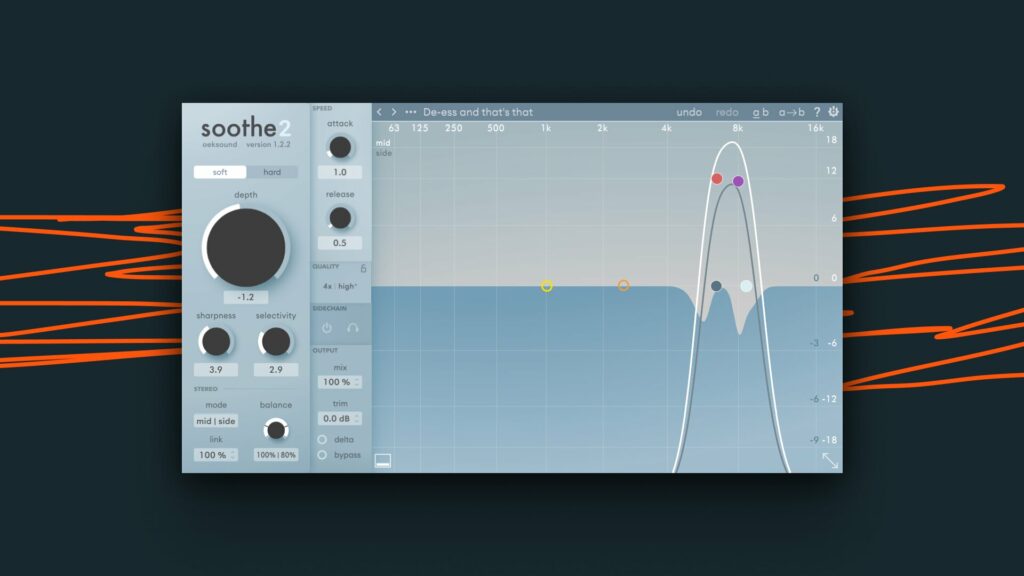
Setting up a de-esser will vary from plugin to plugin, but generally, to set up a de-esser, start by finding the frequency area where the harsh “S” and “T” sounds sit (typically between 7kHz and 14kHz).
After that, all you need to do is set the threshold to a level where it catches all the harsh “S” and “T” sounds without affecting other parts of your vocal’s high-end. Going too extreme with the de-esser can make your vocal lose its presence.
Most de-essers will have one more important knob. A ratio or range knob that determines how much you want to suppress the unwanted frequencies. If you mix vocals, a de-esser is simply a must.
Plugin recommendation:
Logic Pro Stock DeEsser 2
Premium FabFilter Pro-DS
Premium soothe2
4. Subtractive EQ

Early in the processing chain, try to avoid heavy equalization. Instead, you want to add slight adjustments to sculpt the vocal to better fit the upcoming processing chain.
As a general rule of thumb, you always want to start with a high-pass filter first. This will remove any low-end rumble or muddiness that might be present in your vocal. The cutoff frequency will depend on the recording but is usually between 80Hz and 100Hz.
After that, you may want to lower a few other frequency areas by -1 to -2dB. What to lower always depends on the vocal itself, the vocalist, the recording setup, the mic, and many other factors. So when you mix vocals, try giving your vocal a closer listen and slightly lower the frequency areas that you find to be a little too “present” and don’t want to intensify later.
Plugin recommendation:
FL Studio Stock Parametric EQ 2
Ableton Live Stock EQ Eight
Logic Pro Stock Channel EQ
Premium FabFilter Pro-Q3
Free TDR Nova
5. Saturation
Saturation is a great tool for adding extra presence, weight, and fullness to your vocal. It’s often used on vocals to make them cut through the mix a little better.
Saturation can be done in many different ways. Since saturation is nothing but a light distortion, most distortion plugins can do a good job. However, to mix vocals, a dedicated saturation plugin can make things easier. They are typically the ones that do a more precise and cleaner job.
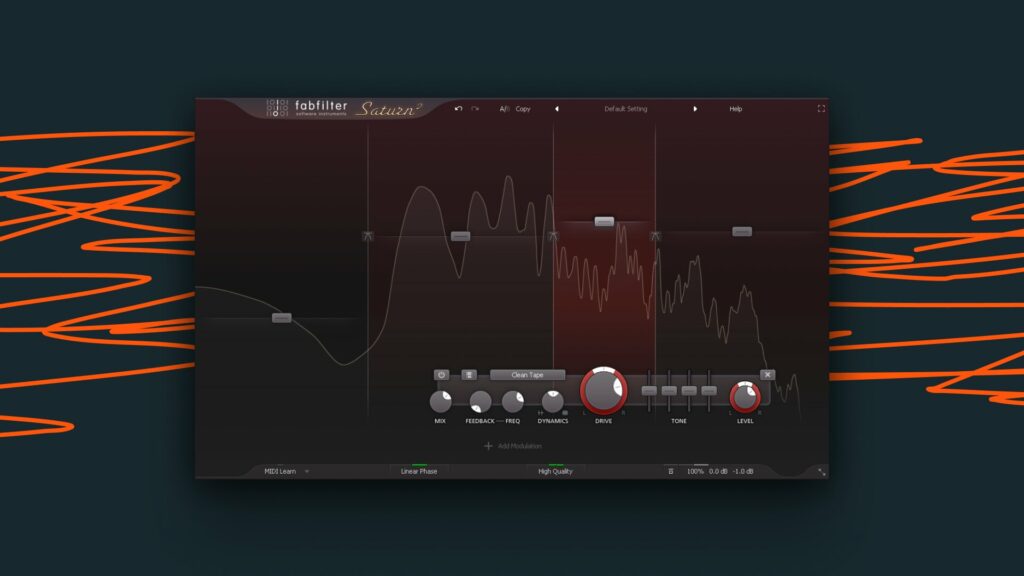
With saturation, all you’re trying to do is add some nice harmonic distortion without sounding too harsh or overbearing. So tape or tube saturation plugins are usually the ones to go with when you mix vocals.
To set up the saturation, start by setting the plugin to a very low amount. You don’t want to go too extreme with the saturation since it can quickly sound overpowering. After that, find the frequency area where you want to add some extra presence and weight. For vocals, this is usually between 1kHz and 3kHz.
Once you’ve found that area, slowly turn up the saturation until you’re happy with the results. Again, be careful not to go too extreme.
Plugin recommendation:
FL Studio Stock Fruity Waveshaper
Ableton Live Stock Saturator
Premium FabFilter Saturn 2
Premium Output Thermal
Free Analog Obsession SPECOMP
6. Compression
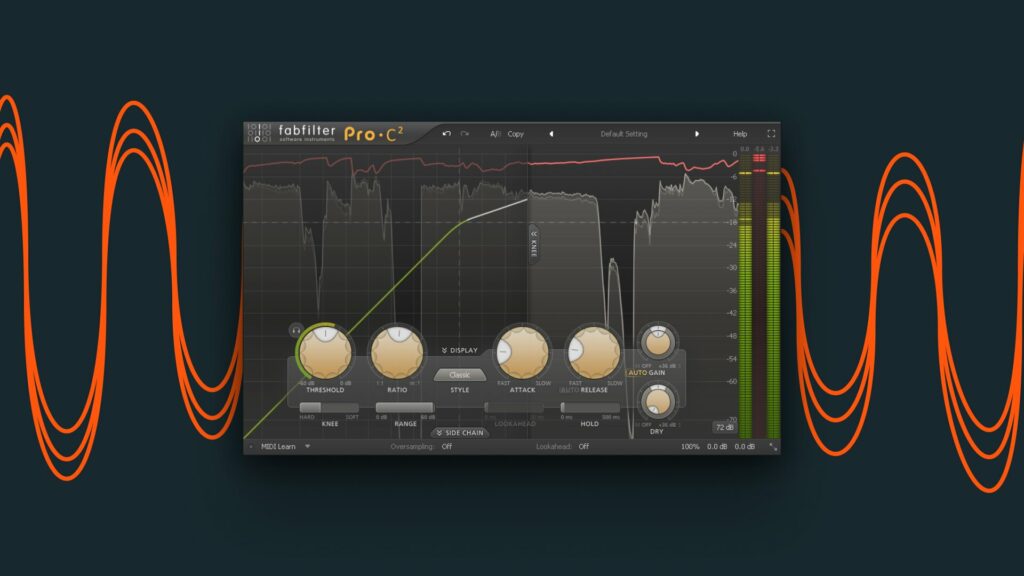
Compression is probably the most critical tool for shaping and molding a vocal. It can do wonders when you mix vocals if used correctly, but it can also quickly ruin a vocal if used too heavy-handedly.
The goal with compression is to even out the dynamics of the vocal. This means that the quieter parts will be amplified, and the louder parts will be attenuated. This results in a more consistent level, often making vocals sit better in a mix.
To set up a compressor, start by setting the threshold to a level where it starts compressing the vocal. The amount of compression will depend on how dynamic the vocal is and how you want it to sound.
A good starting point for the ratio is around 4-to-1. It’ll essentially determine how much the compressor will lower everything that goes over the threshold. Go with something higher (like 6-to-1) for a more aggressive sound or something lower (like 2-to-1) for softer compression.
After that, adjust the attack and release times. You usually want a relatively fast attack time when you mix vocals, so the compressor can quickly catch the transient peaks. For the release time, it again depends on how you want the vocal to sound. A longer release time will result in a more “pumped” and “breathier” sound, while a shorter release time will result in a more “in your face” and “punchy” sound.
Once you’re happy with the sound of the compression, make sure to adjust the makeup gain, so the overall level of the vocal is back to where it was before you applied compression. If your compressor has an “auto gain” feature, you can use it instead.
Bonus tip
When you mix vocals, you don’t have to use just one compressor. Instead, try using two to three different compressors and let them work together. This allows you to fine-tune the sound of the vocal even further and sometimes get better results.
Plugin recommendation:
FL Studio Stock Fruity Compressor or Maximus
Ableton Live Stock Compressor or Multiband Dynamics
Logic Pro Stock Compressor
Premium FabFilter Pro-C2
Free Analog Obsession SweetVox
7. Reverb & Delay

Reverb and delay are usually the last two plugins in a vocal chain. They’re used to add some space and depth to the vocal and make it sound like it’s sitting in the mix better.
Whether you throw these onto the vocal chain itself or on a send/bus channel is again up to you. Setting up reverb and delay send is not too time-consuming and can give you a bit more control over the reverb and delay. An extra EQ is often applied to send channels for further control, but most reverb and delay plugins nowadays come equipped with an EQ.
But send/bus channels can still be a fun way to experiment with. Ever tried formant shifting your delay send? I bet you haven’t, but it can sound super cool. Ever tried setting up a very distorted, at 1kHz high-passed, short room reverb? Probably not, but it can be super effective at adding air and presence to your vocal.
There are also no general settings for your reverb or delay that you can always use to get the perfect sound. It again depends on your vocal recording, the vocalist, the genre, and generally the mix you throw the vocals in.
However, here are a few things to note:
For reverb, you generally don’t want it too big since larger reverbs can easily make your vocals sound washed out and muddy your mix.
For delay, try using it tastefully. If you use a constant delay, you want it mixed relatively low so it’s not too distracting. Whenever you want it to be present, use a second delay and automate it to fill up certain sections where you may wish the delay to be more present.
Bonus tip
Whenever you do want to use somewhat large reverbs or larger delays, you can try sidechaining them to the vocal. Depending on which DAW you use, the process of sidechaining these effects to the vocal will be different, but it’ll essentially allow you to duck or lower the reverb and/or delay whenever the vocal is present and bring them back up in the sections in-between.
This sounds very cool and can help make your vocal sit better in the mix. Especially if your instrumental is rather busy.
Plugin recommendation:
FL Studio Stock Fruity Reeverb 2
Ableton Live Stock Reverb
Logic Pro Stock Chromaverb or Space Designer
Premium FabFilter Pro-R
Premium ValhallaVintageVerb
Free Analog Obsession Room 041
There is no perfect vocal chain.
While this is our favorite vocal chain, it’s not the one that always works. This is because too many factors influence how a vocal should be processed, including genre or style-dependent processing effects that we didn’t even go into.
Also, our plugin recommendations are just that. Our recommendation. It’s what we like to use when processing vocals for our sample packs, but you can easily set up a solid vocal chain with alternative plugins, free plugins, or even stock plugins.
The key is to experiment and find out what works best for you, your vocal recordings, and the project you’re working on. So get creative, try new things out, and see what happens when you mix vocals!